


So, I slowly pieced together the necessary parts to add 200W of solar and 200Ah of battery storage over the last two years… There was such a long delay between buying each solar panel that they changed the design and now I have 2 slightly different solar panels. Oh well, they seem to be working.
Here is my parts list for the project:
- (2) Renogy 100 Watt, 12 Volt Monocrystalline Solar Panels
- (2) Renogy Solar Panel Mounting Z Brackets 4 Units
- (1) Renogy AK-20FT-10 10AWG Solar Cables with MC4 Female and Male Connectors, Connect Solar Panel and Charge Controller (1 Pair), 20′
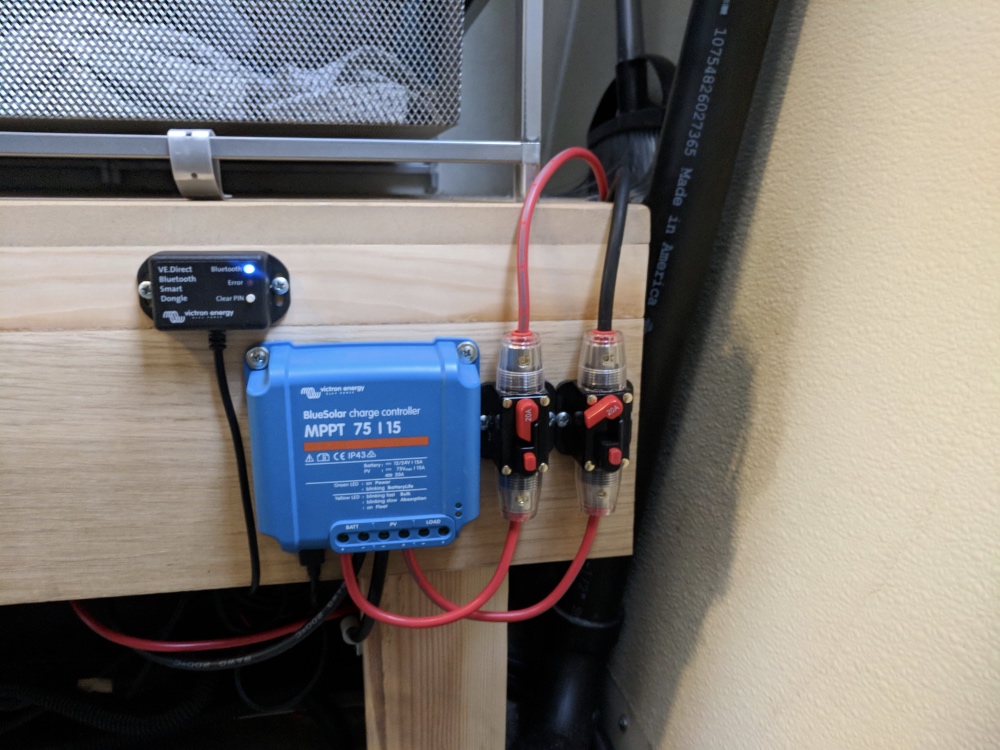
- (1) Victron BlueSolar 75/15 MPPT Charge Controller – 15 Amps / 75 Volts
- (1) Victron VE.Direct Bluetooth Dongle
- (2) 12V DC 20A Inline Circuit Breaker Fuse for System Protection (20A)
- (2) Interstate 6V, 208Ahr Golf Cart Batteries (cheaper from Costco)
- (1) 12V DC 30A Inline Circuit Breaker Fuse for System Protection (30A)
- (1) NOCO HM426 Dual 6-Volt Commercial Grade Battery Box for Automotive, Marine and RV Batteries
- (1) Xantrex 806-1210 PROwatt 1000 Pure Sinewave Inverter
- (10′) 2 Gauge 2 AWG 10 Feet Red + 10 Feet Black Welding Battery Pure Copper Flexible Cable + 10pcs of 3/8″ Tinned Copper Cable Lug Terminal Connectors + 3 F
- (10′) 4 AWG Premium Extra Flexible Welding Cable 600 Volt
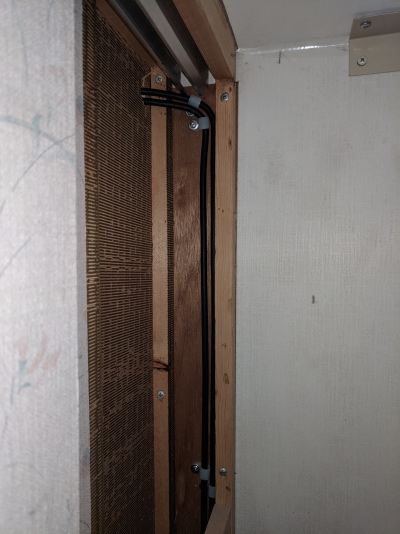
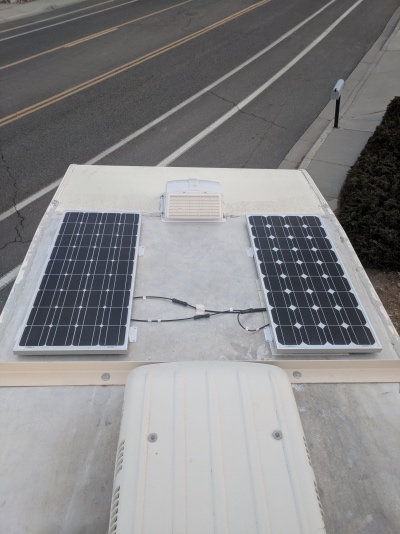
The first thing I did was run all the necessary wiring, which I oversized just in case I wanted to increase the solar capacity at some point in the future. Then, I waited until I had the cargo bumper and batteries installed on it to put up the panels, so that the panels had something to charge… which took a bit to get all painted up (refer to previous post). I then mounted the charge controller, bluetooth dongle, and fuses on the new closet shelf that I made to hold the drawers.
I wired my panels in series, which seemed like a good idea at the time, but it’s still up for debate. My reasoning is that a series configuration with a higher voltage than parallel, there will be less voltage drop through the cables, therefore gained efficiency. At double the voltage (18.9Vx2 operating) there will also be half the current than a parallel configuration (5.2A operating), which is a safer configuration. I’m also a cheap ass, and wiring them in series requires more connections and wiring. Better efficiency and less work… sounds like a great idea, right? Well, maybe not. The problem I didn’t think about is shade, seems kinda obvious now, but oh well. When one panel is shaded and the other is in sun, the output sucks, sinks bad. Theoretically, the problem wouldn’t be as bad if they were wired in parallel, but I haven’t tested it yet. If I have a problem keeping my batteries charged on the road, I’ll consider re-wiring it, but for now I’m happy with the output. I could see it becoming more of a problem when parking under trees, but not much I can do about a cloudy day.
The charge controller was connected to the cables running up to the panels and the two 6V batteries (wired in series) on the bumper. The batteries on the bumper were then connected to the original 12V coach battery (in parallel) with 4 AWG cable and a 30A fused disconnect. This also may not be the best idea, but I really wanted the extra battery capacity, and I’m lazy. It was easiest to do this since the original battery was already wired into the Yote’s fuse panel. Technically, you aren’t supposed to connect mismatched batteries together, but they both claim about a 200Ahr capacity, so I feel like it will be fine.
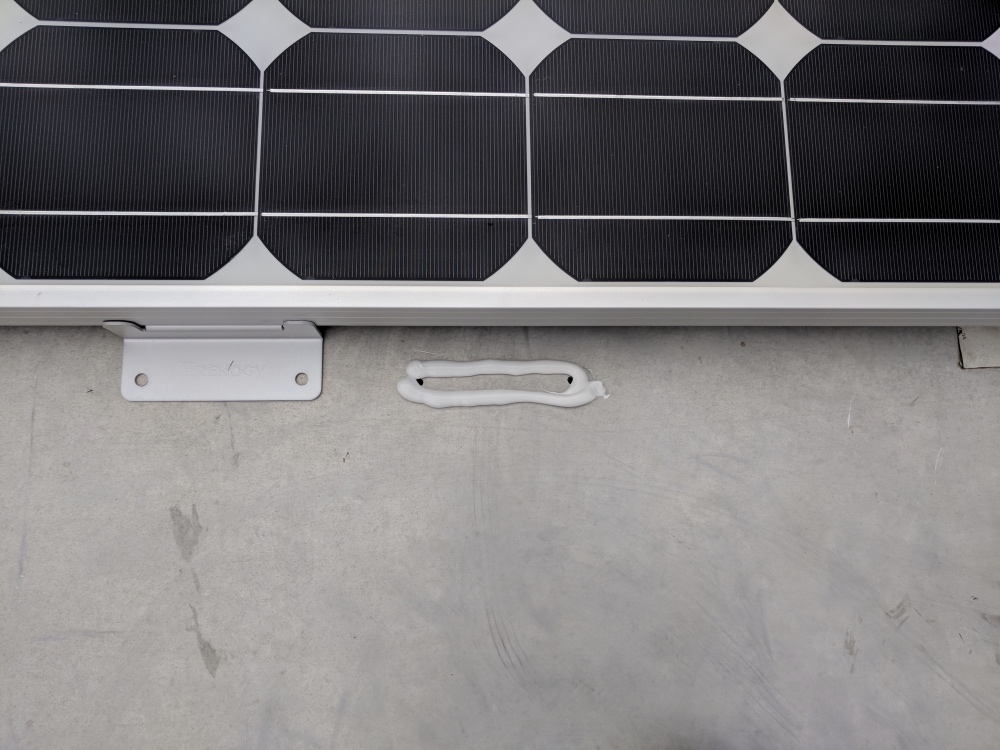
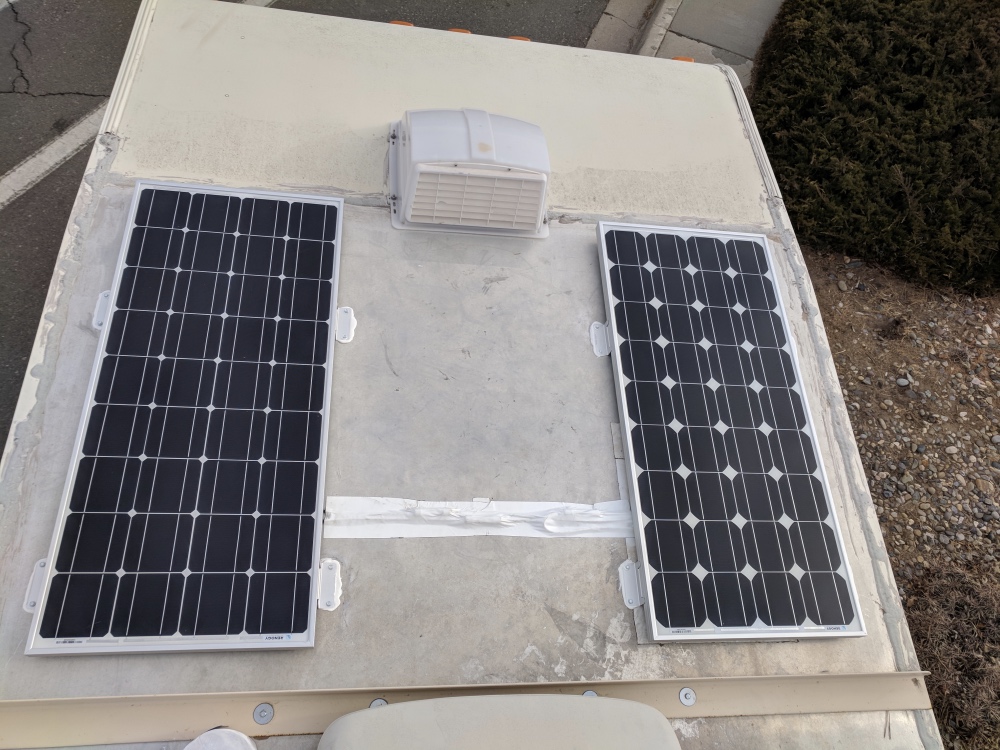
The panels were simple enough to mount, I just drilled the holes for the Z-brackets, and made sure to seal it all up with ProFlex caulking before bolting it all down. Then I secured the wiring with Eternabond tape, which will make it difficult to ever re-wire, but at least I know that it isn’t going anywhere.
I splurged a little on the inverter since I got a $70 Amazon gift card for signing up for the Amazon credit card (how I justify things), figuring that it’s probably worth it getting a nice inverter. So far I’m very pleased with what it can handle, not knowing if I’ll ever find anything I need to power to max out the 1000W. At the moment, I don’t plan on bringing my hair dryer and curling iron, so the biggest power suck I can think of right now is my 400W angle grinder, which runs without a hitch. That nice-lookin sine wave also satisfies my engineering nerdness. Supposedly some power supplies don’t like the step waveform of a modified sine wave, as well as my Makita battery charger, so I think it’s definitely worth the splurge. For the most part, I’d like to power as much as possible off of 12V.
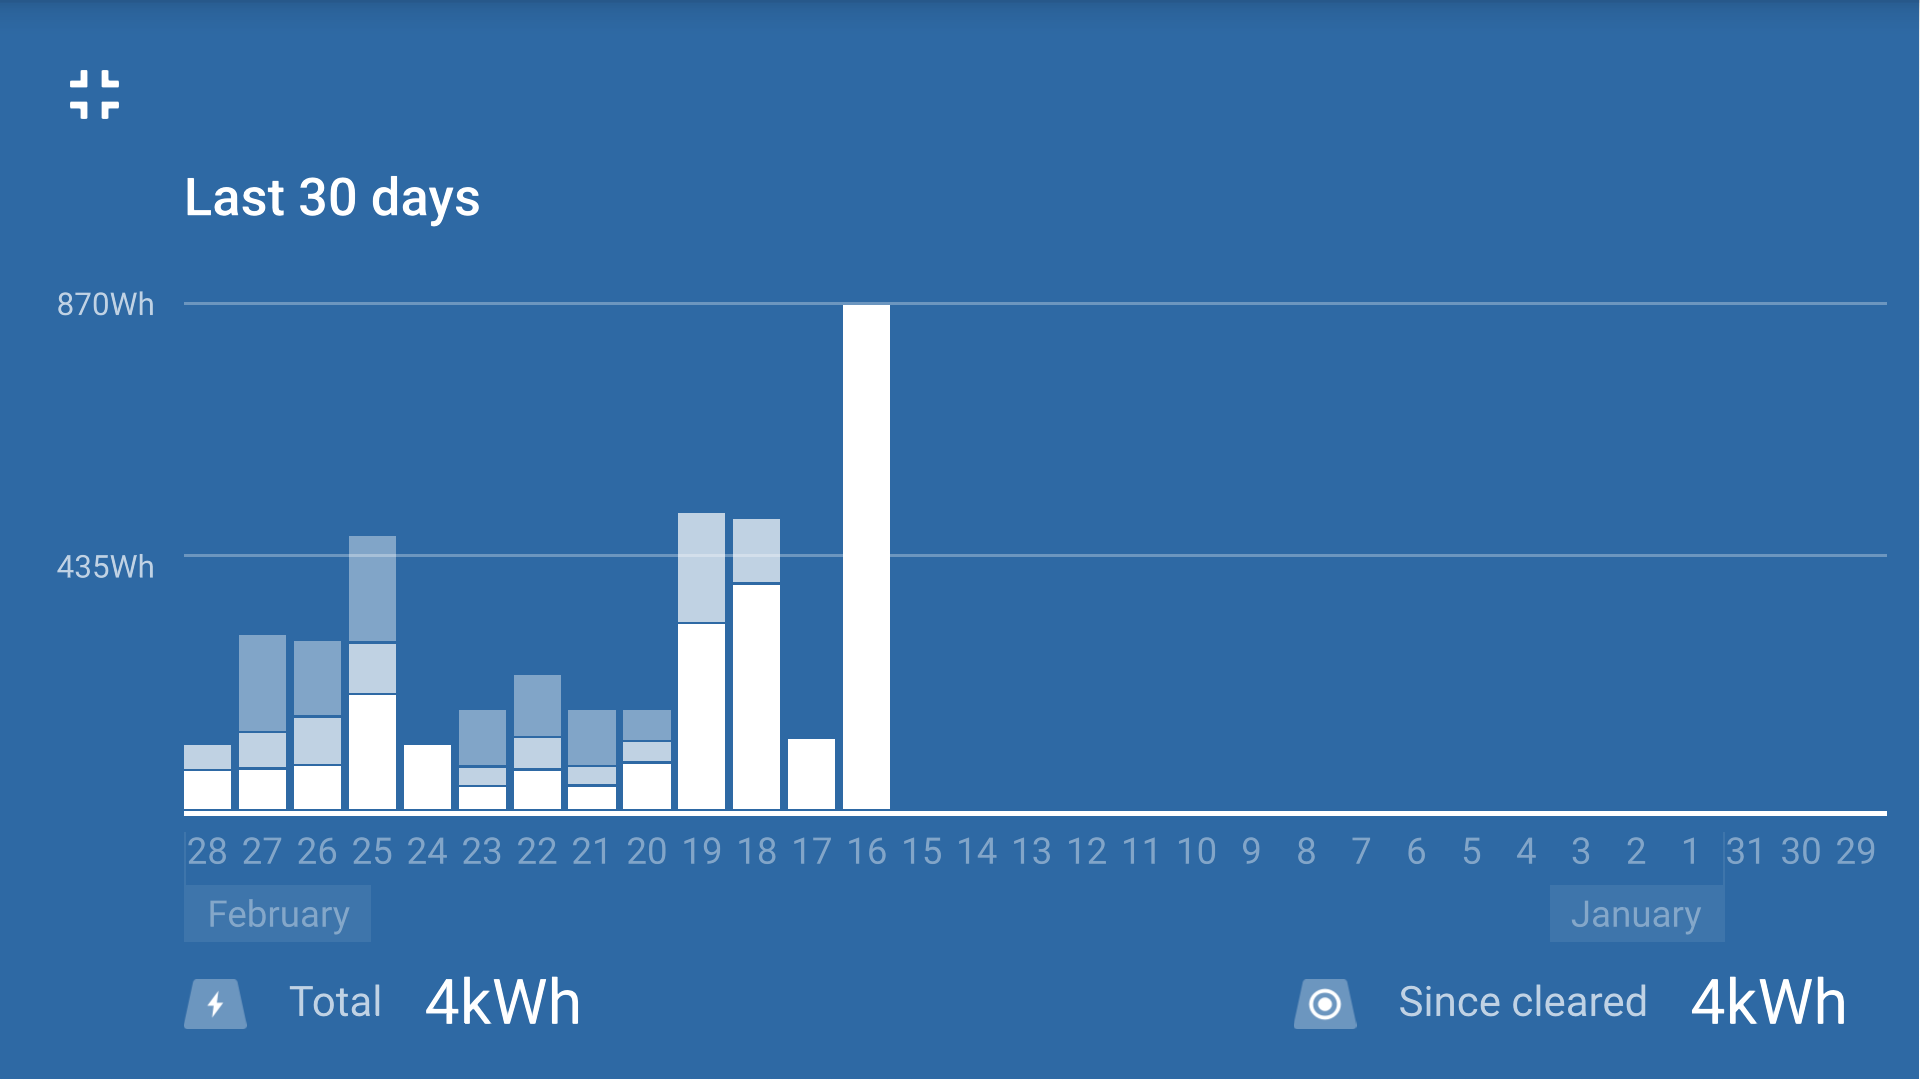
Being the nerd that I am, I’m super pumped about the bluetooth capability of my Victron MPPT charge controller. It lets me see the real-time output, voltages, and consumption through an app on my phone, and tracks 30 days worth of data. Note the first day of charging, where the batteries were at about 5.5V each from sitting for too long.